Colorado roofs carry a load profile that most states never see — dense spring snow that can pack 20 to 40 pounds per square foot on a low-slope commercial roof, hailstorms that dent purlins and crack sheathing without ever showing on the interior ceiling, and wind gusts along the Front Range that regularly exceed 90 mph during winter chinook events. A roof structural inspection is the process a licensed structural engineer uses to evaluate whether the framing, trusses, connections, and decking of a roof can still do the job they were designed for, or whether deterioration, overloading, or poor modification work has pushed the system past a safe margin. This article walks through how a roof structural inspection is performed, what a truss inspection actually checks, how engineers calculate roof load and snow load against current code, and the warning signs that should prompt a property owner to call for an evaluation before the next storm cycle.
What Does a Roof Structural Inspection Actually Involve?
A roof structural inspection is a systematic evaluation of the framing members, connections, sheathing, and load path of a roof system, performed by or under the direction of a licensed structural engineer, to confirm the roof can safely resist dead load, live load, snow load, and wind load as required by the adopted building code. Unlike a general roofing contractor’s inspection, which focuses on the waterproofing membrane, flashing, and shingles, a structural inspection looks underneath the finish materials at the members actually carrying weight — rafters, trusses, ridge beams, ledgers, and their connections to the walls or columns below.
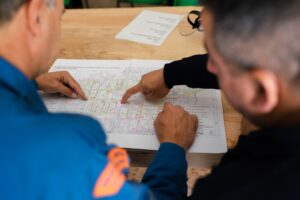
The process typically starts with a document review. If original construction drawings, truss shop drawings, or a prior structural engineer report are available, the engineer compares as-built conditions against the design intent. Field work follows, usually combining an attic or crawlspace walkthrough with exterior observation, and on commercial buildings often a rooftop walk to check for ponding, membrane bubbling over sheathing rot, and mechanical unit placement relative to structural framing. For steep-slope or fragile roofs, many firms now supplement the visual walkthrough with Drone Inspection imagery, which captures high-resolution photos of ridgelines, valleys, and flashing details without putting an inspector on a wet or ice-covered slope.
Which Documents Does an Engineer Review Before the Site Visit?
Before setting foot on a roof, an engineer typically requests the original structural drawings, any truss engineering package stamped by the truss manufacturer, permit history for additions or re-roofing, and photos or reports from any prior storm damage claim. These documents establish the original design snow load, the species and grade of lumber specified, and whether the roof has been re-covered with an additional layer of shingles that adds unaccounted dead load.
When no drawings exist — common on homes built before the 1980s or on outbuildings that were never permitted — the engineer has to reverse-engineer the framing layout in the field, measuring member sizes, spacing, and spans, then checking those dimensions against span tables in the current International Residential Code or against AWC span calculations for the lumber species most common in Colorado, typically Douglas Fir-Larch or Spruce-Pine-Fir.
How Do Engineers Calculate Roof Load and Snow Load in Colorado?
Engineers calculate roof load by combining dead load (the weight of the roofing materials, sheathing, and framing itself), live load (temporary loads from maintenance workers or equipment), and snow load, then checking that combined demand against the capacity of each framing member per ASCE 7 and the locally adopted building code. In most Front Range jurisdictions, ground snow loads used for design range from around 30 psf in Denver and Aurora up to 50 psf or higher in mountain communities like Vail, Breckenridge, and Aspen, with some high-elevation sites exceeding 100 psf.
Ground snow load isn’t the same number used directly on the roof. Engineers apply exposure, thermal, and slope factors from ASCE 7-22 Chapter 7 to convert ground snow load into a flat-roof snow load, then adjust further for roof geometry — valleys and low-slope sections behind parapets are notorious for snow drift accumulation that can double or triple the load compared to the open field value. This is exactly why so many low-slope commercial roof collapses in Colorado happen at parapet-adjacent bays rather than at the roof’s open center.
What Snow Load Figures Should a Property Owner Expect to See in a Report?
A property owner should expect to see the ground snow load value used for the jurisdiction, the calculated flat-roof design snow load, any drift surcharge applied near parapets or higher adjacent roofs, and a comparison of that demand against the roof’s actual measured capacity based on member size and spacing. If the demand exceeds capacity by more than roughly 10 to 15%, most engineers recommend either reinforcement or a documented snow removal protocol rather than immediate replacement.
Reports for commercial buildings often include a table comparing design snow load requirements by jurisdiction, since portfolio owners with properties across several Colorado municipalities need a quick reference for how requirements shift by elevation and exposure category.
| Jurisdiction | Typical Ground Snow Load (psf) | Typical Wind Speed (mph, ASCE 7-22) | Common Roof Framing Type |
|---|---|---|---|
| Denver / Aurora | 30 | 115 | Wood truss, engineered I-joist |
| Boulder | 35–40 | 115 | Wood truss, some steel bar joist commercial |
| Golden / Lakewood | 35 | 115–120 | Wood truss, conventional rafter |
| Breckenridge / Vail | 90–130+ | 105–115 | Heavy timber, steel moment frame, engineered truss |
| Aspen | 100+ | 110 | Steel frame, heavy timber, reinforced truss |
Why Does Truss Inspection Matter So Much for Roof Safety?
Truss inspection matters because a wood or steel roof truss is an interconnected system of triangulated members where every piece depends on every other piece; damage or a missing connection at one panel point can compromise the load path for the entire truss, not just the local area of damage. Unlike a solid rafter, which fails somewhat predictably under overload, a truss with a cut web member or a corroded metal connector plate can lose 30 to 50% of its rated capacity from a single altered joint, often with no visible sag until the failure point is reached.
During a truss inspection, the engineer checks each panel point for gapping at the connector plates, looks for water staining that indicates a leak has been saturating the wood at a joint for months, and verifies that no truss member has been cut, notched, or drilled to route ductwork or plumbing — a shockingly common problem in attics that have been converted for storage or partial living space without engineering review. Steel bar joists on commercial roofs get a parallel inspection focused on bottom chord panel point welds, bridging angle condition, and any signs of overstress buckling in the web members.
What Are the Most Common Truss Defects Found in the Field?
The most common truss defects an inspecting engineer encounters include cut or removed web members, connector plate corrosion or back-out, undersized or missing bridging, water-damaged bottom chords near bathroom or kitchen vents, and unauthorized point loads from HVAC equipment or storage platforms hung directly from the bottom chord.
- Connector plate teeth pulled loose from the wood fibers, usually from repeated moisture cycling
- Truss webs cut to create attic walkway space or duct chases
- Bottom chord splices with inadequate nailing or missing structural screws
- Ponding-induced sag on low-slope truss systems where drainage crickets were never installed
- Improper bearing at the top plate, where a truss has shifted off its designed bearing point during a re-roof
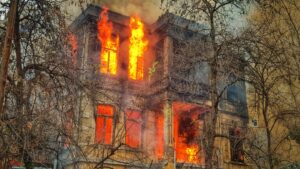
- Fire-related char damage that reduces the effective cross-section of a member without full-depth failure
Each of these defects carries a different repair path. A single cut web can sometimes be sistered with a properly sized and fastened reinforcement member, while widespread connector plate corrosion across a truss system usually points toward a full truss replacement or a supplemental steel reinforcement scheme designed under a stamped repair drawing.
What Are the Warning Signs That a Roof Needs Structural Evaluation?
The clearest warning signs that a roof needs a structural evaluation are visible sagging along the ridge or rafters, doors and windows on the top floor that have started sticking, cracking or popping sounds during snow loading, visible daylight at ridge or hip connections, and standing water or ponding on a low-slope commercial roof after 48 hours. Any one of these on its own justifies a call to an engineer; two or more occurring together usually means the situation has moved past routine maintenance.
Interior clues are often the earliest indicator, showing up well before the roof itself shows obvious distress. Homeowners frequently notice this first as ceiling sagging in a top-floor room, sometimes paired with hairline cracks radiating from a light fixture or ceiling fan box, both of which point toward a truss or rafter that has begun to deflect under sustained load.
How Urgent Is It to Act on These Warning Signs?
Acting within days rather than weeks is warranted whenever active snow or ice is accumulating on a roof already showing sag, cracking sounds, or ponding, since Colorado’s spring storm pattern can add 15 to 20 psf of new load within a 24-hour period on top of an already-compromised system. For signs that appear stable and are not actively worsening — an old stain from a leak that has since been repaired, for example — scheduling an inspection within two to four weeks is generally adequate.
Owners of commercial and multifamily buildings carry an added layer of urgency because occupancy load and liability exposure are higher. A property manager noticing ponding on a flat membrane roof after a heavy snowfall should treat that as a same-week call, not a maintenance backlog item, particularly on older bar-joist commercial buildings built before ASCE 7 drift provisions were tightened in later code editions.
How Does a Roof Structural Inspection Differ Between Residential, Commercial, and Government Buildings?
Roof structural inspections differ mainly in scale, applicable code sections, and documentation requirements: residential inspections typically focus on a single-family truss or rafter system under IRC provisions, commercial inspections must satisfy IBC Chapter 16 load combinations and often involve steel or engineered wood systems with occupancy-based live load requirements, and government or institutional buildings frequently require additional seismic and risk-category review under ASCE 7’s Risk Category III or IV classifications.
A single-family home in Lakewood with a conventional wood truss roof might take two to three hours to inspect and produce a five- to eight-page report. A commercial warehouse or retail structure with steel bar joists and rooftop mechanical units can take a full day of field work plus load calculations, since the engineer has to account for equipment dead load, snow drift behind parapets, and sometimes retrofit anchor points for solar arrays that were added after original construction.
What Should Commercial Property Owners Expect From the Process?
Commercial property owners should expect a more detailed scope that includes a review of tenant-installed rooftop equipment, verification of snow drift loading near any parapet or roof-step condition, and often a formal capacity rating report suitable for insurance underwriting or lender due diligence. This differs meaningfully from a typical single-family review and lines up closely with what’s covered under a commercial building inspection engineer’s broader scope of work.
Government buildings — schools, fire stations, municipal offices — add another layer because many are classified Risk Category III or IV, meaning the structure must remain functional after a design-level event, not just avoid collapse. That classification pushes snow and seismic load factors higher than a comparable commercial building, and inspection reports for these facilities typically require peer review or a second engineer’s sign-off before submission to the owning agency.
My Experience with Roof Structural Inspection
I’ve walked more attics in the Denver metro and mountain corridor than I can count at this point, and the pattern that stands out most isn’t dramatic collapse — it’s the slow accumulation of small, unpermitted changes. I inspected a 1970s ranch in Golden a few winters back where a homeowner had converted the attic into a home office, cutting three truss webs to fit a knee wall without ever consulting an engineer. Nothing had failed yet, but the connector plates at two panel points had already started to gap under normal snow load, and another heavy winter would likely have pushed one truss into visible deflection.
On the commercial side, I’ve seen the drift-loading problem play out almost exactly as the textbooks describe it. A retail strip in Aurora had a two-story stepped roof where the lower section sat directly beneath a taller parapet wall; drifting snow had been quietly overloading that lower bay for years, and the bar joists there showed measurable bottom-chord deflection that the flat-field areas of the same roof never developed. That job reinforced something I tell every client now — a roof rarely fails uniformly, and the worst damage is almost always hiding at a geometry change, not in the open field where everyone assumes to look first.
FAQ
How much does a roof structural inspection cost in Colorado?
Residential roof structural inspections typically run between $450 and $900 depending on attic accessibility and roof complexity, while commercial roof evaluations involving steel framing, multiple rooftop units, or drift load calculations generally range from $1,200 to $4,000 or more depending on square footage and the number of structural systems involved.
Can a roof structural inspection be done without entering the attic?
A limited exterior-only review is possible using rooftop walks and Drone Inspection imagery, but a full structural evaluation almost always requires interior attic or ceiling-cavity access to inspect truss connections, bearing points, and any water damage that isn’t visible from outside.
How often should a commercial roof get a structural inspection?
Most commercial roofs benefit from a structural inspection every three to five years under normal conditions, with additional inspections triggered immediately after any hailstorm exceeding one-inch stone size, any wind event over 70 mph, or before adding new rooftop equipment such as HVAC units or solar arrays.
What’s the difference between a roof inspection and a roof structural inspection?
A standard roof inspection, usually performed by a roofing contractor, evaluates the waterproofing membrane, shingles, and flashing for leaks and wear, while a roof structural inspection is performed by a licensed engineer and evaluates whether the underlying framing, trusses, and connections can safely carry the required dead, live, and snow loads.
Does a sagging roof always mean the trusses have failed?
Not always — sagging can result from undersized ridge beams, inadequate bracing, long-term moisture damage, or a single altered truss member, and distinguishing between cosmetic settling and a genuine load-path problem requires the kind of on-site evaluation described in a full Structural Inspection rather than a visual guess from the ground.
For homeowners weighing whether a roof issue is isolated or part of a broader foundation or framing concern, it’s worth reviewing our guide on wall cracks and when to worry, since roof load problems and wall distress sometimes share a common structural cause. Building owners managing multiple properties across the Front Range and mountain communities can also explore our Commercial Structural Engineering Services for portfolio-level inspection scheduling and code compliance planning.
Sources
ASCE 7 Minimum Design Loads Standard, American Society of Civil Engineers
Snow Load Safety Guidance, Federal Emergency Management Agency