Understanding floor sagging structural issues and solutions starts with recognizing that a dip in your living room floor is rarely a cosmetic problem you can paper over with a rug. In more than a decade of crawling through Colorado basements and attics, I’ve traced sagging floors back to a handful of root causes: foundation settlement, undersized or rotted joists, overloaded beams, and moisture intrusion that quietly degrades wood framing over years. This article walks through what actually causes floor sagging structural issues, how to read the warning signs correctly, and what a proper structural repair looks like once the diagnosis is confirmed.
What Causes Floor Sagging Structural Issues?
Floor sagging structural issues generally trace back to three overlapping problems: foundation movement, framing member failure, and long-term moisture damage. Foundation settling happens when the soil beneath footings consolidates unevenly or loses bearing capacity, causing sections of the foundation to drop relative to the rest of the structure. Once that happens, the floor system above transfers load differently than it was designed to, and joists that were level begin to slope toward the settled area. In Colorado’s Front Range, expansive clay soils and bentonite-rich formations near Golden, Castle Rock, and parts of Colorado Springs make differential settlement a recurring issue that I see in homes built as recently as the 1990s.
The IBC addresses much of this under Chapter 18 (Soils and Foundations), which sets minimum requirements for footing depth, bearing capacity, and reinforcement based on soil classification. Section 1808 specifically requires geotechnical evaluation when expansive soils are suspected, and footing design that ignores this can lead directly to the kind of differential settlement that produces sagging floors ten or twenty years later. Builders who skip a proper geotechnical report, or who use standard prescriptive footing sizes on soils that don’t support them, are setting up a floor sagging structural problem long before the drywall ever goes up.
Joist-related causes are just as common in older housing stock. Dimensional lumber joists spanning more than their allowable span per IRC Table R502.3.1(1), joists notched improperly for plumbing or electrical runs, and joists weakened by long-term moisture exposure can all deflect well beyond the L/360 live-load limit that most residential codes require for framing supporting plaster or drywall ceilings. Beam failure adds another layer: a built-up 2×10 beam undersized for its tributary load, or a steel I-beam corroded at a bearing point in a crawlspace, will settle under sustained load and create the classic sagging pattern that runs perpendicular to the joist direction. I’ve measured deflections exceeding an inch over a 12-foot span in homes where a previous owner removed a load-bearing wall without ever installing a replacement beam.
How to Identify Floor Sagging Structural Issues?
You can identify floor sagging structural issues by checking for a measurable slope with a 4-foot level or laser level, listening for consistent creaking that intensifies near a specific wall or beam line, and watching for diagonal cracks in drywall that radiate from door and window corners. A slope exceeding 1 inch over 20 feet — roughly the tolerance most engineers use as a red flag — usually indicates an active or historic settlement issue rather than normal construction tolerance. Sticking doors, gaps between baseboards and flooring, and visibly bowed floor joists viewed from a crawlspace or basement ceiling are all confirming signs.
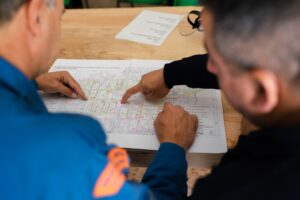
A proper structural inspection goes well beyond a walkthrough with a level. I typically document floor elevations on a grid pattern using a laser level referenced to a fixed benchmark, then compare that data against the original framing plans if available. Moisture readings taken with a pin-type meter at sill plates and joist ends help rule out active water intrusion, and a visual crawlspace inspection checks for pier settlement, rotted sill plates, and undersized or missing mid-span support columns. This is the same methodology used in our Structural Inspection engagements, where quantitative floor elevation data gets tied directly to a repair recommendation rather than a vague “monitor it” conclusion.
Denver’s building department, along with most jurisdictions along the I-25 corridor, doesn’t mandate periodic structural inspections for single-family homes outside of point-of-sale transactions or permit-triggered work, but multi-family and commercial structures often fall under more frequent inspection cycles tied to occupancy classification. Homeowners in older Denver neighborhoods like Park Hill, Washington Park, and Berkeley — many built between 1900 and 1950 on original masonry or rubble foundations — should treat any new floor slope as a signal worth investigating rather than something to wait out.
What Are the Consequences of Ignoring Floor Sagging Structural Issues?
Ignoring a sagging floor allows the underlying cause — whether foundation movement, joist deterioration, or beam overload — to keep progressing, and progression compounds the repair cost significantly. A foundation issue caught early might require partial pier installation in the $3,000 to $8,000 range; the same foundation left to settle for another five years can require full perimeter underpinning costing $20,000 or more, along with drywall, flooring, and door repairs across multiple rooms. Structural members don’t fail gracefully in most cases — deflection increases gradually until a critical point, at which sudden cracking or partial collapse becomes possible under live load, particularly during events like a heavy snow load on an upper floor or a crowded gathering concentrating point loads on an already-compromised span.
ASCE’s infrastructure and structural safety guidance consistently points to deferred maintenance as one of the largest drivers of avoidable structural failure costs nationally, and residential floor systems are no exception. Beyond the direct repair bill, an unaddressed sag shows up on a home inspection report during any future sale, and buyers’ lenders will frequently require a structural engineer’s letter before closing — a process that can add 30 to 60 days to a transaction and give the buyer significant negotiating leverage on price.
Colorado’s Division of Fire Prevention and Control, along with local building departments, treats life-safety issues in occupied structures seriously, and a floor system that has deflected past its design tolerance can trigger a red-tag or occupancy restriction if reported during a permit inspection for unrelated work. That’s a costly and disruptive outcome compared to addressing the sag proactively while it’s still a repair rather than a life-safety event.
My Experience with Floor Sagging Structural Issues
I worked a case in Boulder a few years back where a homeowner called after noticing a dip near their fireplace hearth that had grown noticeable enough to roll a marble across the room. Floor elevation survey showed nearly 1.5 inches of differential settlement concentrated at one corner of the house, tracing back to a footing that had never been extended below the frost depth required for that elevation. We designed a helical pier retrofit with six piers spaced along the affected foundation wall, each load-tested to 1.5 times the design load before being locked off, and the homeowner saw the floor stabilize within the first week of installation.
A second case, a mixed-use commercial building near downtown Denver, involved a very different failure mode. A slow plumbing leak above a ground-floor retail space had gone unnoticed for what the tenant estimated was close to two years, and by the time I got called in, three parallel 2×10 joists had lost enough section from rot that they were deflecting nearly 3/4 inch under normal foot traffic. We sistered new pressure-treated joists alongside the compromised members, replaced a short section of a bearing beam that showed similar decay, and specified a vapor barrier and improved ventilation to prevent recurrence. That project reinforced something I tell every client now: floor sagging structural issues caused by moisture rarely stay contained to a single joist, so the inspection has to extend well beyond the visibly damaged area before any repair plan gets finalized.
How to Address Floor Sagging Structural Issues?
Addressing floor sagging structural issues correctly starts with a diagnostic inspection to isolate the cause, followed by an engineered repair — never a cosmetic fix like shimming a floor level without correcting the underlying support. Once the source is confirmed, whether it’s a settled footing, a rotted joist, or an undersized beam, the repair design has to account for the load path the original framing was supposed to carry, plus any additional load from renovations completed since the original construction.
Common repair techniques include installing helical or push piers beneath settled footings, sistering new lumber alongside deteriorated joists, and replacing undersized beams with engineered LVL or steel members sized for actual span and load conditions rather than assumption. Hydraulic jacking is often used to carefully raise a sagging floor back toward level before a permanent beam or pier is locked into place — this has to be done slowly, often over several weeks at a rate of no more than 1/8 inch per day, to avoid cracking drywall, plaster, or brick veneer elsewhere in the structure. For basement-level work where headroom and access are constraints, this process frequently overlaps with foundation repair scopes, which is why our Foundation Inspection service is often the starting point before any structural repair design gets drawn up.
Preventative maintenance plays a real role in avoiding repeat problems. Grading the soil away from foundations at a minimum 6-inch drop over the first 10 feet, maintaining functioning gutters and downspout extensions, and controlling crawlspace humidity below 60% relative humidity all reduce the moisture-related causes of floor sagging. For homes with known expansive soil conditions, seasonal monitoring of foundation cracks and door alignment can catch movement early, well before it shows up as a visible floor slope.
What Are the Benefits of Addressing Floor Sagging Structural Issues?
Correcting a sagging floor restores the structure’s load path to its original design intent, which eliminates the safety risk of progressive deflection and removes a major red flag from any future home inspection or appraisal. Beyond safety, a properly engineered repair typically comes with a stamped letter from the structural engineer of record, which carries real weight with lenders, insurers, and future buyers who want documentation that the fix was done to code rather than patched over.
The economic case is straightforward. Research from housing industry groups on deferred maintenance consistently shows that addressing structural issues early costs a fraction of what’s required once damage spreads to finishes, flooring, and adjacent framing members. A $6,000 pier installation completed early is a far better outcome than a $35,000 repair scope that includes foundation work, new flooring, drywall replacement, and remediation of secondary cracking in load-bearing walls above.
Related structural issues often show up alongside floor sagging, and it’s worth reading up on how they connect. The Understanding Ceiling Sagging Causes: A Structural Engineer’s Perspective article covers a closely related failure mode, since a sagging floor above often produces a corresponding ceiling sag in the room below. Homeowners noticing cracking in masonry walls alongside floor movement should also review the guide on cracked brick walls, since foundation settlement frequently produces both symptoms simultaneously.
FAQ on Floor Sagging Structural Issues and Repair
The following questions come up in nearly every consultation involving a sagging floor, and the answers below reflect what I tell clients directly during a site visit.
Beyond these core questions, homeowners often ask about timeline and disruption during repair work, which varies significantly depending on whether the fix involves pier installation, joist sistering, or beam replacement — projects can range from a single day for minor joist repairs to two or three weeks for full perimeter underpinning.
What is the most common cause of floor sagging structural issues?
Foundation settlement is the most common root cause, typically driven by expansive or poorly compacted soil beneath footings that weren’t designed or installed to account for local soil conditions. In Colorado specifically, bentonite clay content in the soil is a frequent culprit, since it swells and contracts significantly with seasonal moisture changes.
Joist deterioration from long-term moisture exposure and undersized beams left over from unpermitted renovations are the next most common causes I encounter in the field, often appearing together in older homes where multiple issues have compounded over decades.
How can I identify floor sagging structural issues before they get worse?
A level or laser level check across suspect areas of the floor, paired with a visual inspection of the crawlspace or basement ceiling for bowed joists and cracked bearing points, will catch most floor sagging structural issues while they’re still minor. Any slope exceeding roughly 1 inch over 20 feet warrants a professional structural evaluation.
Watching for secondary indicators — doors that no longer latch properly, new gaps at baseboards, or diagonal drywall cracks near openings — helps catch problems between visible floor inspections, since these symptoms often appear before the sag itself becomes noticeable underfoot.
What are the consequences of ignoring floor sagging structural issues?
Ignoring these issues allows the underlying cause to progress, increasing both the eventual repair cost and the safety risk, since deflection in floor framing tends to accelerate once it passes a certain threshold rather than staying static. Left unaddressed long enough, sagging floors can complicate or derail home sales, trigger inspection red flags, and in severe cases create genuine collapse risk under concentrated loads.
Insurance carriers may also decline coverage or require repairs as a condition of a policy renewal once a documented structural issue like a sagging floor appears on an inspection report, adding a financial consequence beyond the repair itself.
How can I address floor sagging structural issues correctly?
Addressing floor sagging structural issues correctly means starting with a diagnostic structural inspection to identify the root cause, then implementing an engineered repair — piers, sistered joists, or beam replacement — rather than a cosmetic leveling fix that ignores the underlying support failure. Any reputable repair plan should include documentation and, where required, permitted inspection by the local building department.
Homes with a history of remodeling, particularly where walls have been removed or altered, benefit from a review under our Structural Modification Design service to confirm that prior alterations didn’t leave a beam or header undersized for the loads it now carries. If flooring issues coincide with visible wall cracking, the guide on wall cracks and when to worry is a useful companion read for understanding how these symptoms relate.
Sources:
American Society of Civil Engineers
International Code Council